课程 28 - 与 AI 结合
如今 GPT 4o(gpt-image-1)和 Nano banana(gemini-2.5-flash-image)大幅降低了图片编辑的门槛。从人机交互上看,聊天框和画布结合的形式正变得越来越流行,和模型的聊天记录天然体现了图片的修改历史,而可自由拖拽的画布让选择图片与并行处理变得自然,详见 UI for AI。
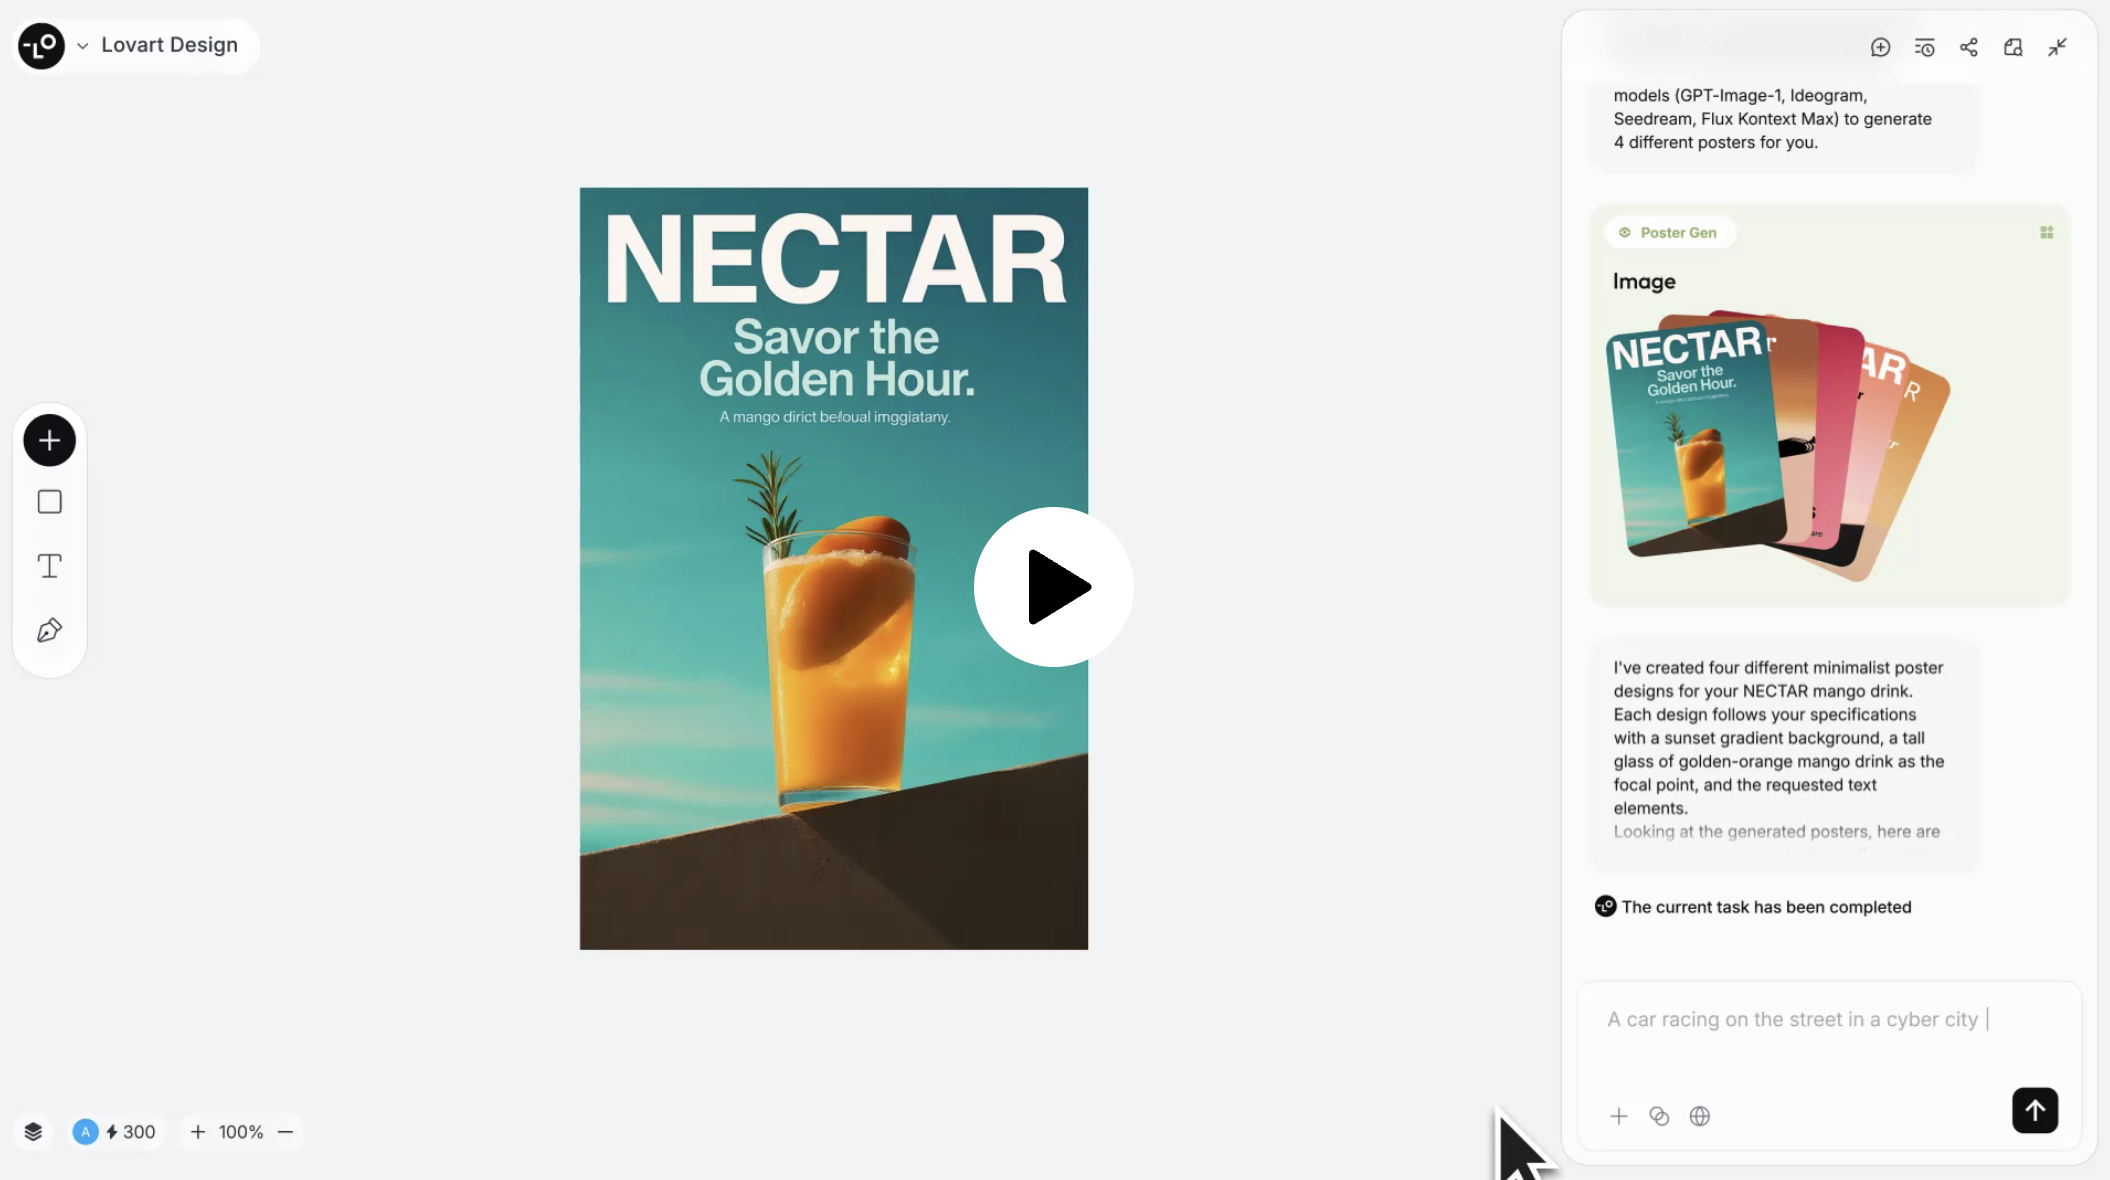
下图为 Lovart 的产品界面,底层使用了我们在 课程 21 - Transformer 中提及的 Konva.js。虽然以图片编辑为主,但并没有放弃图形编辑器中的常用功能,例如左下角默认隐藏了图层列表,左侧工具栏也可以插入一些基础图形。
Recraft 也正在测试聊天框功能。以我的观察,画布与聊天框正在成为这类编辑器的两大入口:
本节课中我们会结合 Nano banana 丰富我们的图片编辑功能。
接入模型
为了使用 Nano banana,我选择了 fal.ai,而没有选择 Google 官方的 generative-ai。理由是统一的 API 更便于我对比其他生图模型的效果,例如 qwen-image-edit 或者 FLUX.1 Kontext。
这样的聚合类 SDK 还有很多例如 OpenRouter,以生图接口为例,只需要传入 prompt 就可以得到生成图片的 URL 和原始的模型文本响应:
import { fal } from '@fal-ai/client';

const result = await fal.subscribe('fal-ai/gemini-25-flash-image', {
    input: {
        prompt: '',
    },
});
console.log(result.data); // { image: [{ url: 'https://...' }]; description: 'Sure, this is your image:' }
图片修改接口接受的参数也是一组图片的 URL,即使传递了编码后的 DataURL 也会收到类似 “无法读取图片信息” 的警告。因此 fal.ai 提供了文件上传接口,我们可以选择当本地图片被添加到画布中时开启上传。
API 设计
我们需要一个负责生成和修改图片的 API,这两种情况下参数应该完全一致:一个 prompt 和参考图列表
import { fal } from '@fal-ai/client';

api.createOrEditImage = async (
    isEdit: boolean,
    prompt: string,
    image_urls: string[],
): Promise<{ images: { url: string }[]; description: string }> => {
    const result = await fal.subscribe(
        isEdit
            ? 'fal-ai/gemini-25-flash-image/edit'
            : 'fal-ai/gemini-25-flash-image',
        {
            input: {
                prompt,
                image_urls,
            },
        },
    );
    return result.data;
};
加入聊天框
聊天框提供了画布之外的另一个起始点。
清除背景
双击图片进入编辑模式后,在 prompt 中让 Nano banana 智能地移除背景,生成过程中可以加入 loading 效果,完成后将新图片 URL 替换:
private async removeBackground() {
    this.removingBackground = true;
    const { images } = await createOrEditImage(
        true,
        'Remove background from the image',
        [this.node.fill],
    );
    if (images.length > 0) {
        this.api.runAtNextTick(() => {
        this.api.updateNode(newImage, { fill: images[0].url });

        this.api.record();
        this.removingBackground = false;
        });
    }
}
Inpainting
适合对画面中选定的已有对象进行擦除、修改,同时保证其他部分不变。
https://www.recraft.ai/docs#inpaint-image
Inpainting replaces or modifies specific parts of an image. It uses a mask to identify the areas to be filled in, where white pixels represent the regions to inpaint, and black pixels indicate the areas to keep intact, i.e. the white pixels are filled based on the input provided in the prompt.
当用户使用简单的编辑器绘制了一个闭合区域后,需要转换成 mask 参数传给 API。这个 mask 其实就是一张灰度图:
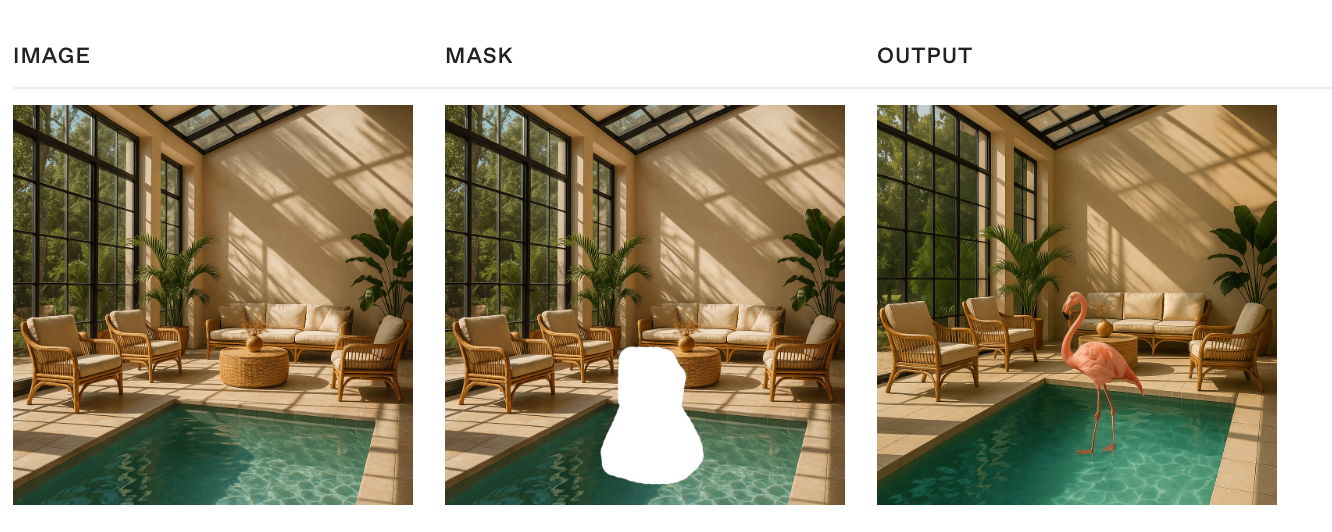
这里就体现出编辑器的重要性了,即便是简单的一些编辑功能也有价值,Recraft 提了三点:https://www.recraft.ai/blog/inpainting-with-ai-how-to-edit-images-with-precision-using-recraft
- Ease of zooming in and out 毕竟是精细操作,画布的放大缩小很关键。
- AI inpainting 利用 SAM 这样的分割模型自动
- Creative flexibility
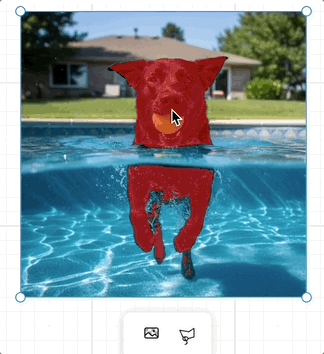
生成 mask
我们可以提供多种交互方式让用户生成 mask:
- 课程 26 - 选择工具 中介绍的框选
- 课程 25 - 绘制模式与笔刷 中介绍的笔刷工具
通过 WebGPU 使用 SAM
除了让用户尽可能精细地表达修改区域,如果能通过更简单的方式,例如点选就完成区域的选择就更好了。

在 课程 1 - 硬件抽象层 中我们就介绍过 WebGPU 的优势(Figma 也在近日升级了渲染引擎),除了渲染更是在 Compute Shader 的支持上让浏览器端 GPGPU 成为可能。ONNX 提供了 Web 端的运行时,这样就可以在浏览器端进行实时推理,不需要消耗任何 token。详见:How to add machine learning to your web application with ONNX Runtime
我们参考这篇文章:Image Segmentation in the Browser with Segment Anything Model 2,
- 为了减小运行时的下载模型大小,使用了 ORT model format
- 使用 WebGPU 获得更快的推理速度,详见:Using the WebGPU Execution Provider
- 在 WebWorker 中运行,不阻塞主线程
以上功能封装成了 SAM plugin,完整例子详见:在 WebWorker 中使用 SAM 分割图像
其他实践以及 SAM3 相关资料可以参考:
- Segment Anything 2, in WebGPU
- Request for Official ONNX Export + TensorRT Conversion Scripts for SAM3
通过 SAM 得到的 Mask 可以作为参考图传给生图模型
端侧模型 LaMa
Client-Side Image Inpainting with ONNX and Next.js 介绍了如何在端侧使用 LaMa 模型完成
合并多张图片
使用画布能够额外获取图片的位置信息,通常很难用语言描述,例如我们可以将一个茶杯拖拽到桌面的任意位置并合成一张图片。
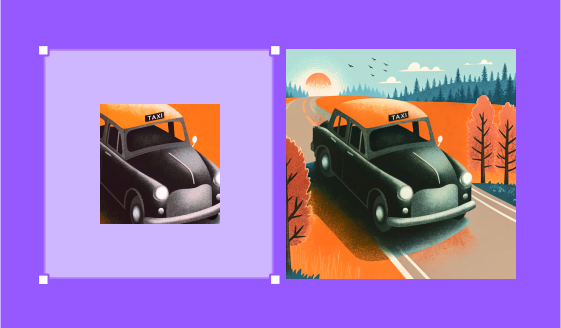
Outpainting
这个功能 OpenAI 暂时没有对应的 API 实现。先来看看 Recraft 是如何做的。https://www.recraft.ai/blog/ai-outpainting-how-to-expand-images
Outpainting allows users to expand an image beyond its original frame — especially useful for completing cropped images or adding more background scenery.
适合保持画面中选中对象不变,例如更换背景:
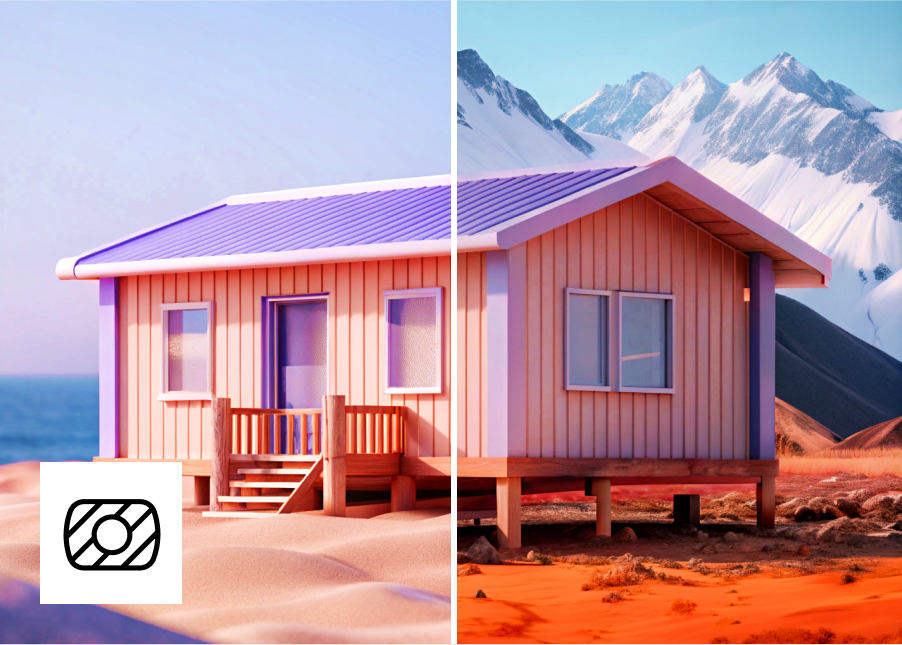
或者向外扩展:
目前 GPT 4o 仅支持三种固定尺寸,而 Nano banana 想实现任意图片尺寸输出需要借助一些 hack 手段,例如传入一张指定尺寸的空白图作为参考图并在 prompt 中强调。我们可以通过画布操作让它变的十分自然:用户只需要拖拽到合适的尺寸即可,应用通过 Canvas API 自动生成这个空白的参考图。
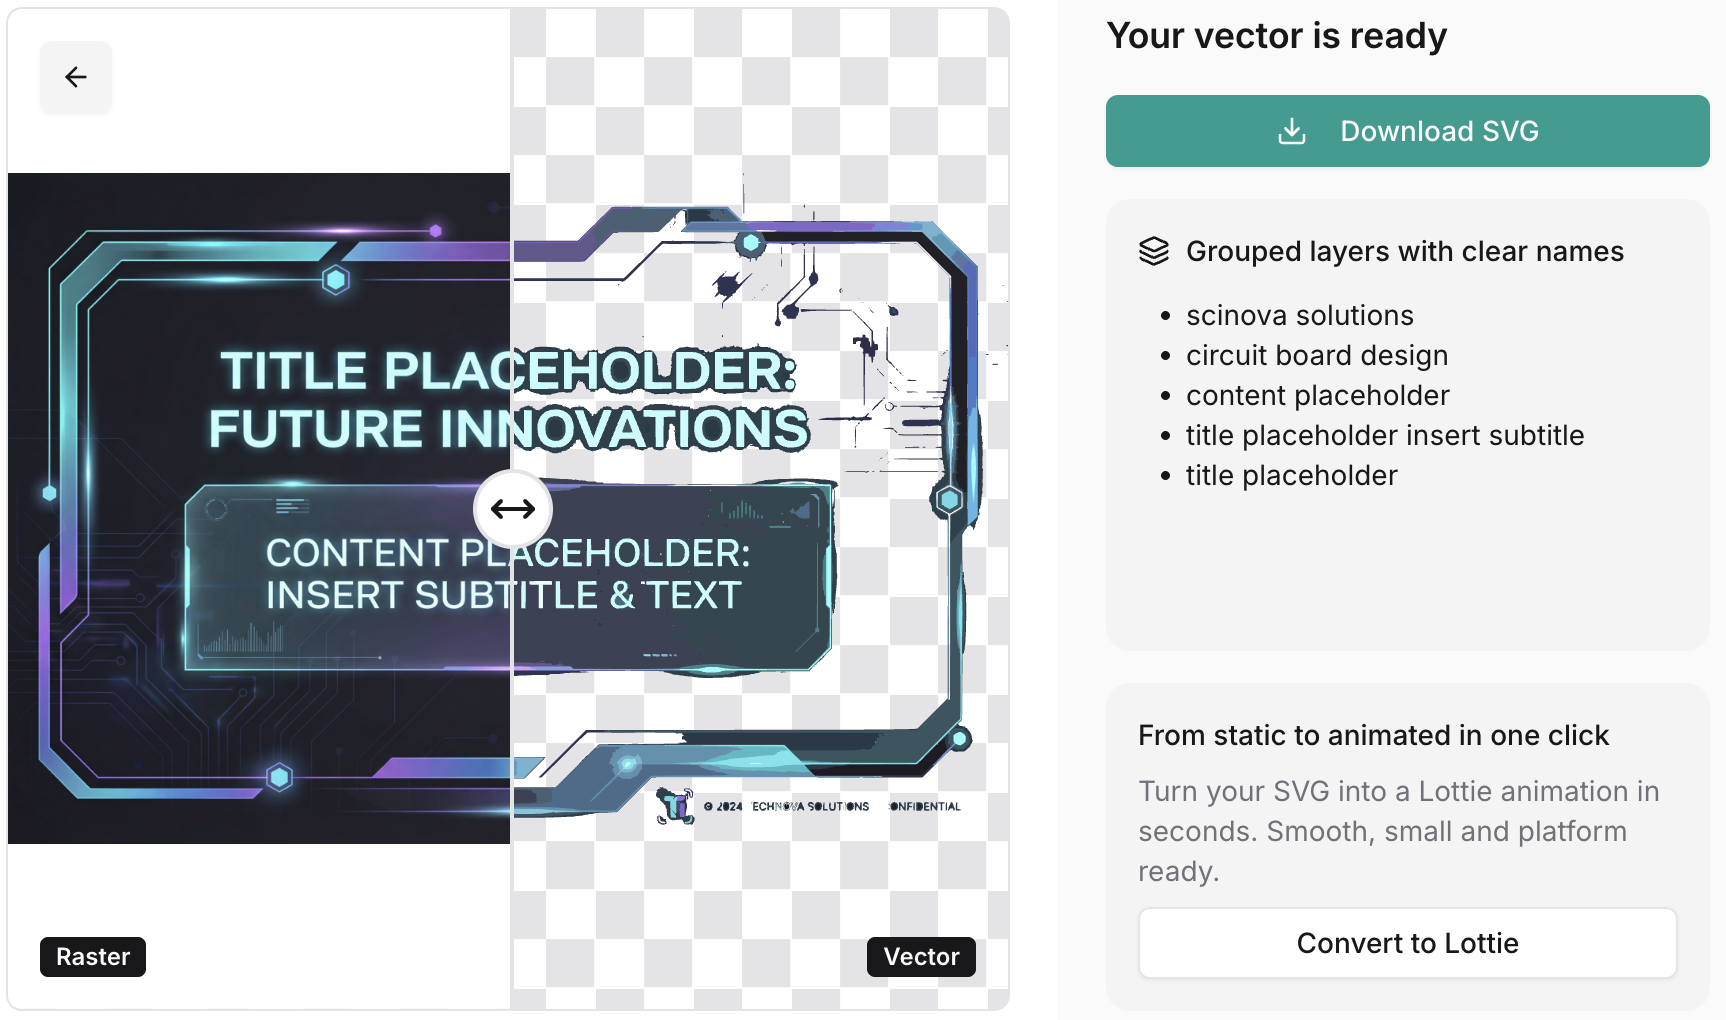
图层分解
矢量化
很多在线和开源工具提供了基于传统图像处理的方案:
- Recraft AI image vectorizer
- Lottiefiles Raster to Vector converter
- vtracer
但这种方案对于文本处理效果并不好:
原因是该算法通常分成以下几个阶段,第一阶段并不会区分文本和适合矢量化的图形:
- "Path walking" 将像素转换成 Path
- 将 Path 简化成 polygon
- 尝试对 polygon 进行平滑操作

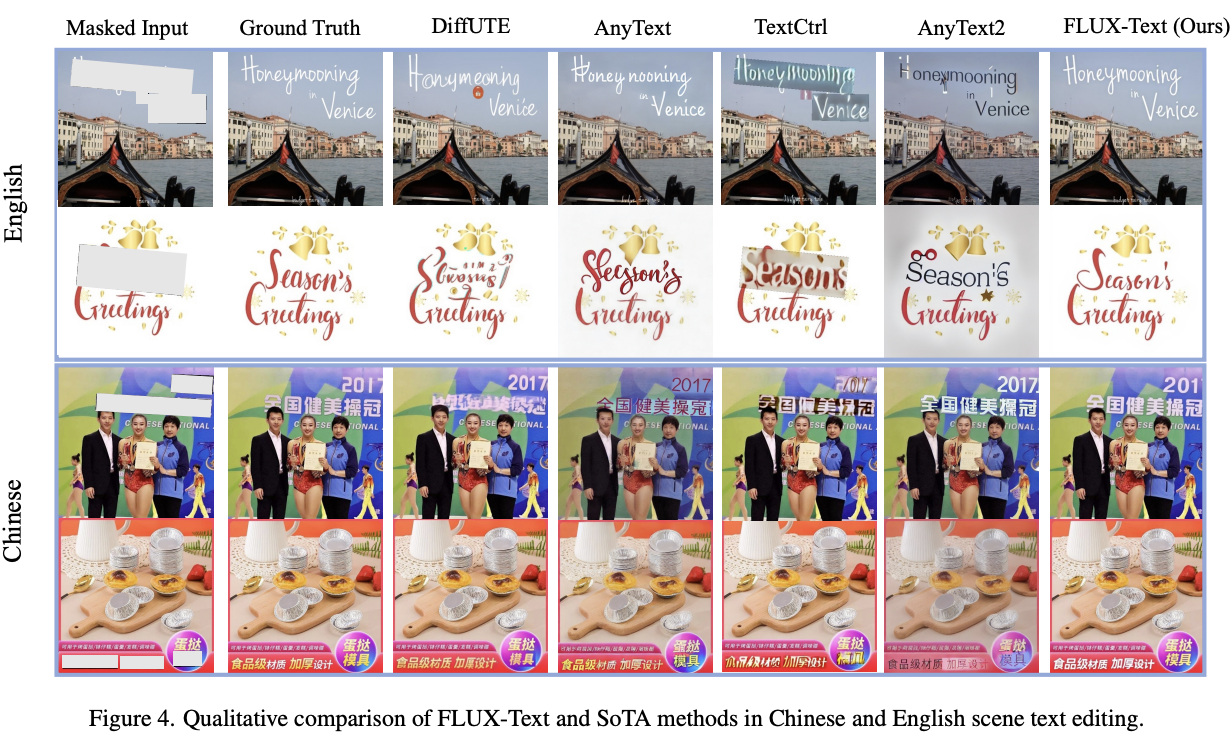
分离背景与文字
首先使用 OCR 类工具识别文字区域,并生成 mask。然后去除掉 mask 让模型重新生成图片,进行常规的 inpainting 流程,就得到了不带文字的背景图片。
FLUX-Text: A Simple and Advanced Diffusion Transformer Baseline for Scene Text Editing
使用开源的 Qwen-Image-Layered 可以实现图层分解,在 fal.ai plugin 中我们实现了如下效果:

字体识别
接下来需要识别文字区域中字体、字号等样式属性。
TextStyleBrush: Transfer of Text Aesthetics from a Single Example
Adobe Photoshop 提供了 Match fonts 功能:

whatfontis 提供了公开的 API,可以在图片的指定区域在字体库中匹配最接近的字体;
[
    {
        "title": "Abril Fatface",
        "url": "https://www.whatfontis.com/FF_Abril-Fatface.font",
        "image": "https://www.whatfontis.com/img16/A/B/FF_Abril-FatfaceA.png"
    }
]
最后将各部分图层叠加。
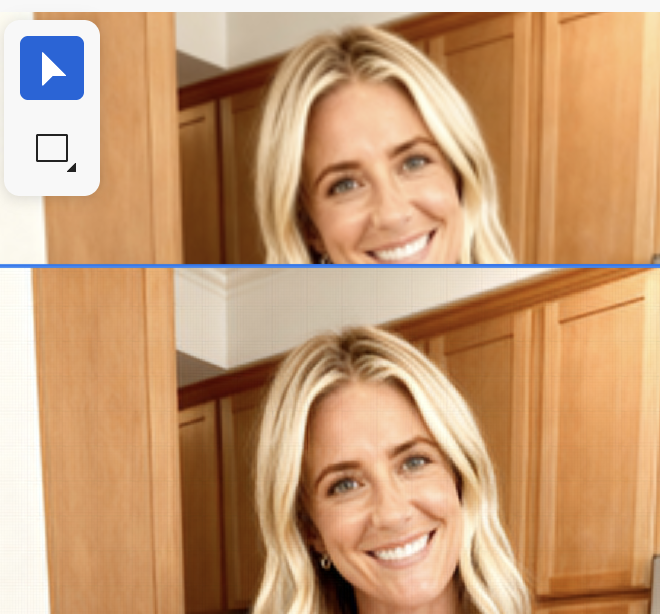
提升图片分辨率
利用模型可以提升图片的分辨率,下图展示了 Topaz Gigapixel 模型的效果:

在 fal.ai 上可以直接使用 fal-ai/topaz/upscale/image 或者 SeedVR2,在浏览器端我们可以在 WebWorker 中使用 UpscalerJS,它默认使用 @upscalerjs/esrgan-medium 4x 模型。相关功能详见:upscaler plugin,效果如下:
其他端侧方案
UpscalerJS 使用了 tensorflow.js,如果使用 ONNX 可以选择 super-resolution-js,另外 LiteRT 也可以继续关注:
[WIP] MCP
来自 MCP: What It Is and Why It Matters:
Instead of only having a GUI or API that humans use, you get an AI interface “for free.” This idea has led to the concept of “MCP-first development”, where you build the MCP server for your app before or alongside the GUI.
Figma MCP Server 可以操作 Figma API
pencil.dev
The bi-directional MCP vector canvas you’ve been dreaming about. see pencil.dev
Pencil doesn’t provide just MCP reading tools, but also full write access + many other handy tools to fully operate the canvas. This is the real magic. You can plug-in the whole world of MCPs, bring in data from other sources like databases, APIs, chart data, Playwright/Puppeteer or plugin other agents easily. You are in charge!