课程 29 - 嵌入 HTML 内容
有时候我们希望在画布中嵌入 HTML 内容,例如 VS Code 代码块、YouTube 播放器、CodeSandbox 组件、ShaderToy 等等。
创建 HTML 容器
Excalidraw 并不支持在画布中嵌入 HTML 内容,但 tldraw 支持 TLEmbedShape。它在网页中将一个 HTML 容器(含 iframe 或其他元素)和画布 <svg> 元素并排或叠加显示,而不是“完全”在单一画布内部。
容器分成两层:
- HTML layer 作为
<canvas>的兄弟节点存在,包含所有 HTML container,负责相机同步 - HTML container 作为每个
html/embed图形的容器,负责单个图形的定位
相机同步
在 课程 4 - 相机 中,我们介绍了相机的一系列重要参数:平移、旋转和缩放。现在我们需要把相机参数映射为 HTML 容器的 CSS transform,实现画布与 HTML 容器的同步。
const { cameraZoom, cameraX, cameraY } = this.appStateProvider.value;

$htmlLayer.style.transform = `scale(${toDomPrecision(
    cameraZoom,
)}) translate(${toDomPrecision(-cameraX)}px, ${toDomPrecision(-cameraY)}px)`;
同时使用绝对定位,相对整个画布容器:
$htmlLayer.style.position = 'absolute';
$htmlLayer.style.top = topbarVisible ? `${TOP_NAVBAR_HEIGHT}px` : '0px';
$htmlLayer.style.left = '0px';
HTML 图形容器
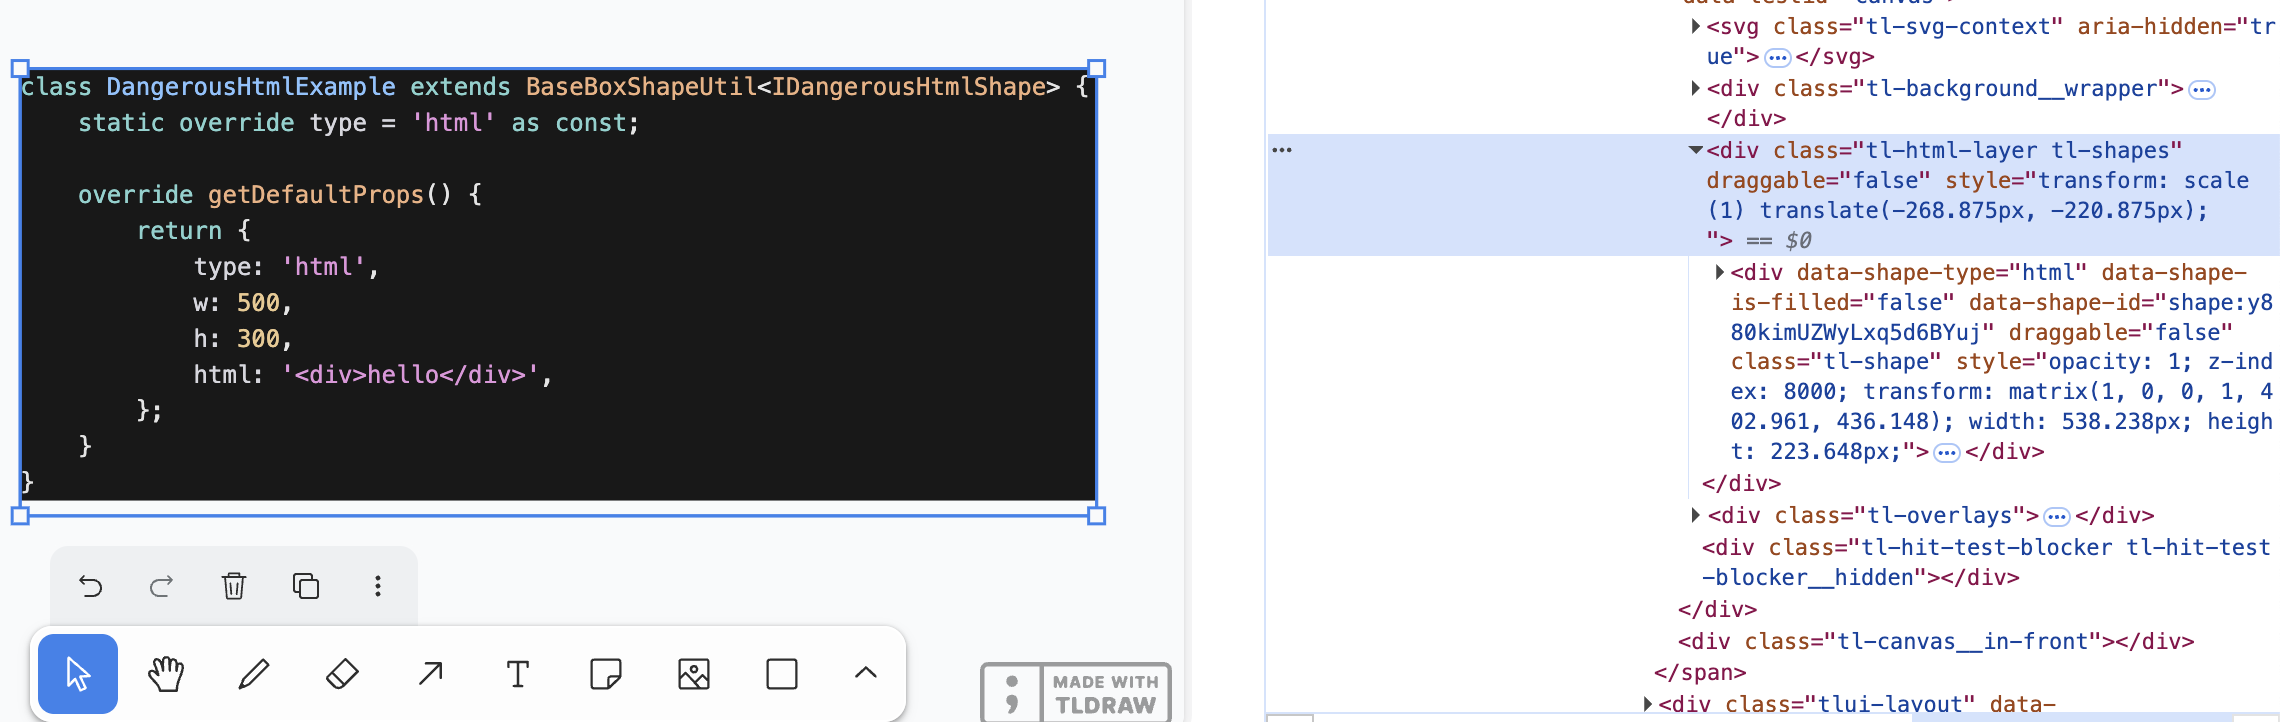
在 External content sources 例子中,我们可以看到 tldraw 是这样支持 HTML 内容的:
class DangerousHtmlExample extends BaseBoxShapeUtil<IDangerousHtmlShape> {
    static override type = 'html' as const;

    override getDefaultProps() {
        return {
            type: 'html',
            w: 500,
            h: 300,
            html: '<div>hello</div>',
        };
    }
}
我们也增加一种可序列化图形,除了通用的属性 x/y/width/height 之外,最重要的属性就是 innerHTML 内容:
export interface HtmlAttributes {
    html: string;
}
export interface HtmlSerializedNode
    extends BaseSerializeNode<'html'>,
        Partial<HtmlAttributes> {}
当位置发生改变时,需要通过 CSS Transform 同步:
const { matrix } = entity.read(GlobalTransform);

$child.style.transform = `matrix(${toDomPrecision(
    matrix.m00,
)}, ${toDomPrecision(matrix.m01)}, ${toDomPrecision(
    matrix.m10,
)}, ${toDomPrecision(matrix.m11)}, ${toDomPrecision(
    matrix.m20,
)}, ${toDomPrecision(matrix.m21)})`;
$child.style.width = `${toDomPrecision(width)}px`;
$child.style.height = `${toDomPrecision(height)}px`;
剔除
在 课程 8 - 剔除 中我们已经介绍过,完全处于视口之外的 HTML 内容应该被隐藏,这可以通过 display: none; 实现。我们使用 课程 18 - ECS 中介绍过的方式,使用 System 的查询方式追踪所有包含 HTML 组件,且 Culled 组件发生变化的实体。
export class RenderHTML extends System {
    private readonly culled = this.query(
        (q) => q.with(HTML).addedChangedOrRemoved.with(Culled).trackWrites,
    );

    execute() {
        this.culled.addedChangedOrRemoved.forEach((entity) => {
            entity.read(HTMLContainer).element.style.display = entity.has(
                Culled,
            )
                ? 'none'
                : 'block';
        });
    }
}
但如果仅是部分处于画布之外呢?值得注意的是 tldraw 在 .tl-canvas 容器上设置了以下 CSS 属性:
.tl-canvas {
    overflow: clip;
    content-visibility: auto;
    touch-action: none;
    contain: strict;
}| 属性 | 解决的问题 |
|---|---|
| overflow: clip | 禁止滚动,确保坐标系稳定,避免 scroll 偏移污染渲染 |
| content-visibility: auto | 优化视口外 DOM(如选区、远程光标等)性能 |
| touch-action: none | 完全接管触控操作,避免浏览器默认手势干扰 |
| contain: strict | 把画布作为独立渲染岛,减少重排和重绘开销 |
下面我们介绍如何展示 HTML 内容。
粘贴 URL
在 课程 24 - 读取剪贴板 中,我们介绍过如何处理剪贴板中的图片和文本内容。
URL 是特殊的文本,在 tldraw 中:
- 当 URL 被识别为外部链接时,默认处理器会抓取页面的 metadata(og:image、title、favicon、description),并把这些信息包装成一个 bookmark asset(TLBookmarkAsset)和对应的 shape,使用书签样式渲染
- 当 URL 是可嵌入内容(例如 YouTube、Figma、Google Maps 等),此时使用
<iframe>渲染 - 当 URL 是图片或者视频资源时,把它作为媒体 asset(TLImageAsset / TLVideoAsset)去加载并用 ImageShapeUtil 渲染
// @see https://github.com/tldraw/tldraw/blob/main/packages/tldraw/src/lib/ui/hooks/clipboard/pasteUrl.ts#L12
export async function pasteUrl() {
    return await editor.putExternalContent({
        type: 'url',
        point,
        url,
        sources,
    });
}
书签
// @see https://github.com/tldraw/tldraw/blob/ef0eba14c5a8baf4f36b3659ac9af98256d3b5dd/packages/tldraw/src/lib/defaultExternalContentHandlers.ts#L249
export async function defaultHandleExternalUrlAsset() {
    let meta: {
        image: string;
        favicon: string;
        title: string;
        description: string;
    };

    const resp = await fetch(url, {
        method: 'GET',
        mode: 'no-cors',
    });
    const html = await resp.text();
    const doc = new DOMParser().parseFromString(html, 'text/html');
    meta = {
        image:
            doc.head
                .querySelector('meta[property="og:image"]')
                ?.getAttribute('content') ?? '',
        // title, favicon, description
    };

    // Create bookmark asset
}
使用 iframe 渲染
很多站点都提供了分享后内嵌到网页的控件,以 YouTube 为例,需要将播放链接通过一定的规则转换成可嵌入链接,随后就可以用 <iframe> 展示了:
// 输入的 URL 为 https://www.youtube.com/watch?v=37fvFffAmf8
const embedUrl = `https://www.youtube.com/embed/${videoId}${search}`;

const $iframe = document.createElement('iframe');
$iframe.src = embedUrl;
图片 URL
粘贴 HTML 内容
从 VS Code 中复制的代码块是 HTML 片段:
<meta charset="utf-8" />
<div
    style="color: #e4e4e4;background-color: #181818;font-family: Menlo, Monaco, 'Courier New', monospace;font-weight: normal;font-size: 12px;line-height: 18px;white-space: pre;"
>
    <div><span style="color: #d6d6dd;">### iframe</span></div>
</div>
我们可以尝试从剪贴板中读取它:
const html = event.clipboardData?.getData(MIME_TYPES.html); // text/html然后就可以根据内容创建。为了获取尺寸,可以把 HTML 内容插入一个隐藏元素,然后让浏览器排版,最后读取它的 offsetWidth / offsetHeight
function createHTML(
    api: ExtendedAPI,
    appState: AppState,
    html: string,
    position?: { x: number; y: number },
) {
    const { width, height } = measureHTML(html);

    updateAndSelectNodes(api, appState, [
        {
            id: uuidv4(),
            type: 'html',
            x: position?.x ?? 0,
            y: position?.y ?? 0,
            width,
            height,
            html,
        },
    ]);
}
与 HTML 内容交互
有些 HTML 内容是可以交互的,例如将 YouTube 播放器嵌入画布后仍希望能够播放。但我们在 HTML 容器上设置了 pointer-events: none;,这会阻止视频的播放。常用的办法是采用双击进入编辑模式的交互方式,用来与画布默认的单击选中图形行为区分开。
其实之前在 课程 16 - 使用原生输入框 中,我们也是通过双击 Text 图形进入编辑模式的。这里我们正式为图形添加一个 isEditing 属性,开启这个属性时去除 HTML 容器上的 pointer-events: none; 样式。
export interface BaseSerializeNode<Type extends string> {
    editable? boolean;
    isEditing?: boolean;
}class RenderHTML extends System {
private readonly editables = this.query(
(q) => q.withAny(HTML, Embed).addedOrChanged.with(Editable).trackWrites,
);
execute() {
this.editables.addedOrChanged.forEach((entity) => {
const { element } = entity.read(HTMLContainer);
const { isEditing } = entity.read(Editable);
element.style.pointerEvents = isEditing ? 'auto' : 'none';
});
}
}在双击选中的图形后进入编辑模式,单击其他区域退出编辑模式:
if (input.doubleClickTrigger) {
    selection.mode = SelectionMode.EDITING;
    api.updateNode(api.getNodeByEntity(selected), { isEditing: true });
}

if (input.pointerDownTrigger) {
    if (selection.mode === SelectionMode.EDITING) {
        const toSelect = this.getTopmostEntity(api, x, y, (e) => !e.has(UI));
        if (selection.editing && toSelect !== selection.editing) {
            api.updateNode(api.getNodeByEntity(selection.editing), {
                isEditing: false,
            });
            selection.editing = undefined;
            selection.mode = SelectionMode.SELECT;
        }
    }
}
你可以双击上面的 YouTube 播放器例子,进入编辑模式后就可以播放视频了。
导出成 SVG 或图片
在 课程 10 - 图片导入导出 中我们介绍过导出画布内容成 SVG 或者 PNG 等格式的图片。对于 HTML 内容可以使用社区内比较成熟的方案,例如 html-to-image
This library uses a feature of SVG that allows having arbitrary HTML content inside of the <foreignObject> tag.