Lesson 28 - Integrating with AI
Today, GPT 4o (gpt-image-1) and Nano banana (gemini-2.5-flash-image) have significantly lowered the barrier to image editing. From a human-computer interaction perspective, the combination of chat interfaces and canvas is becoming increasingly popular. Chat history with models naturally reflects the modification history of images, while freely draggable canvas makes image selection and parallel processing natural. For more details, see UI for AI.
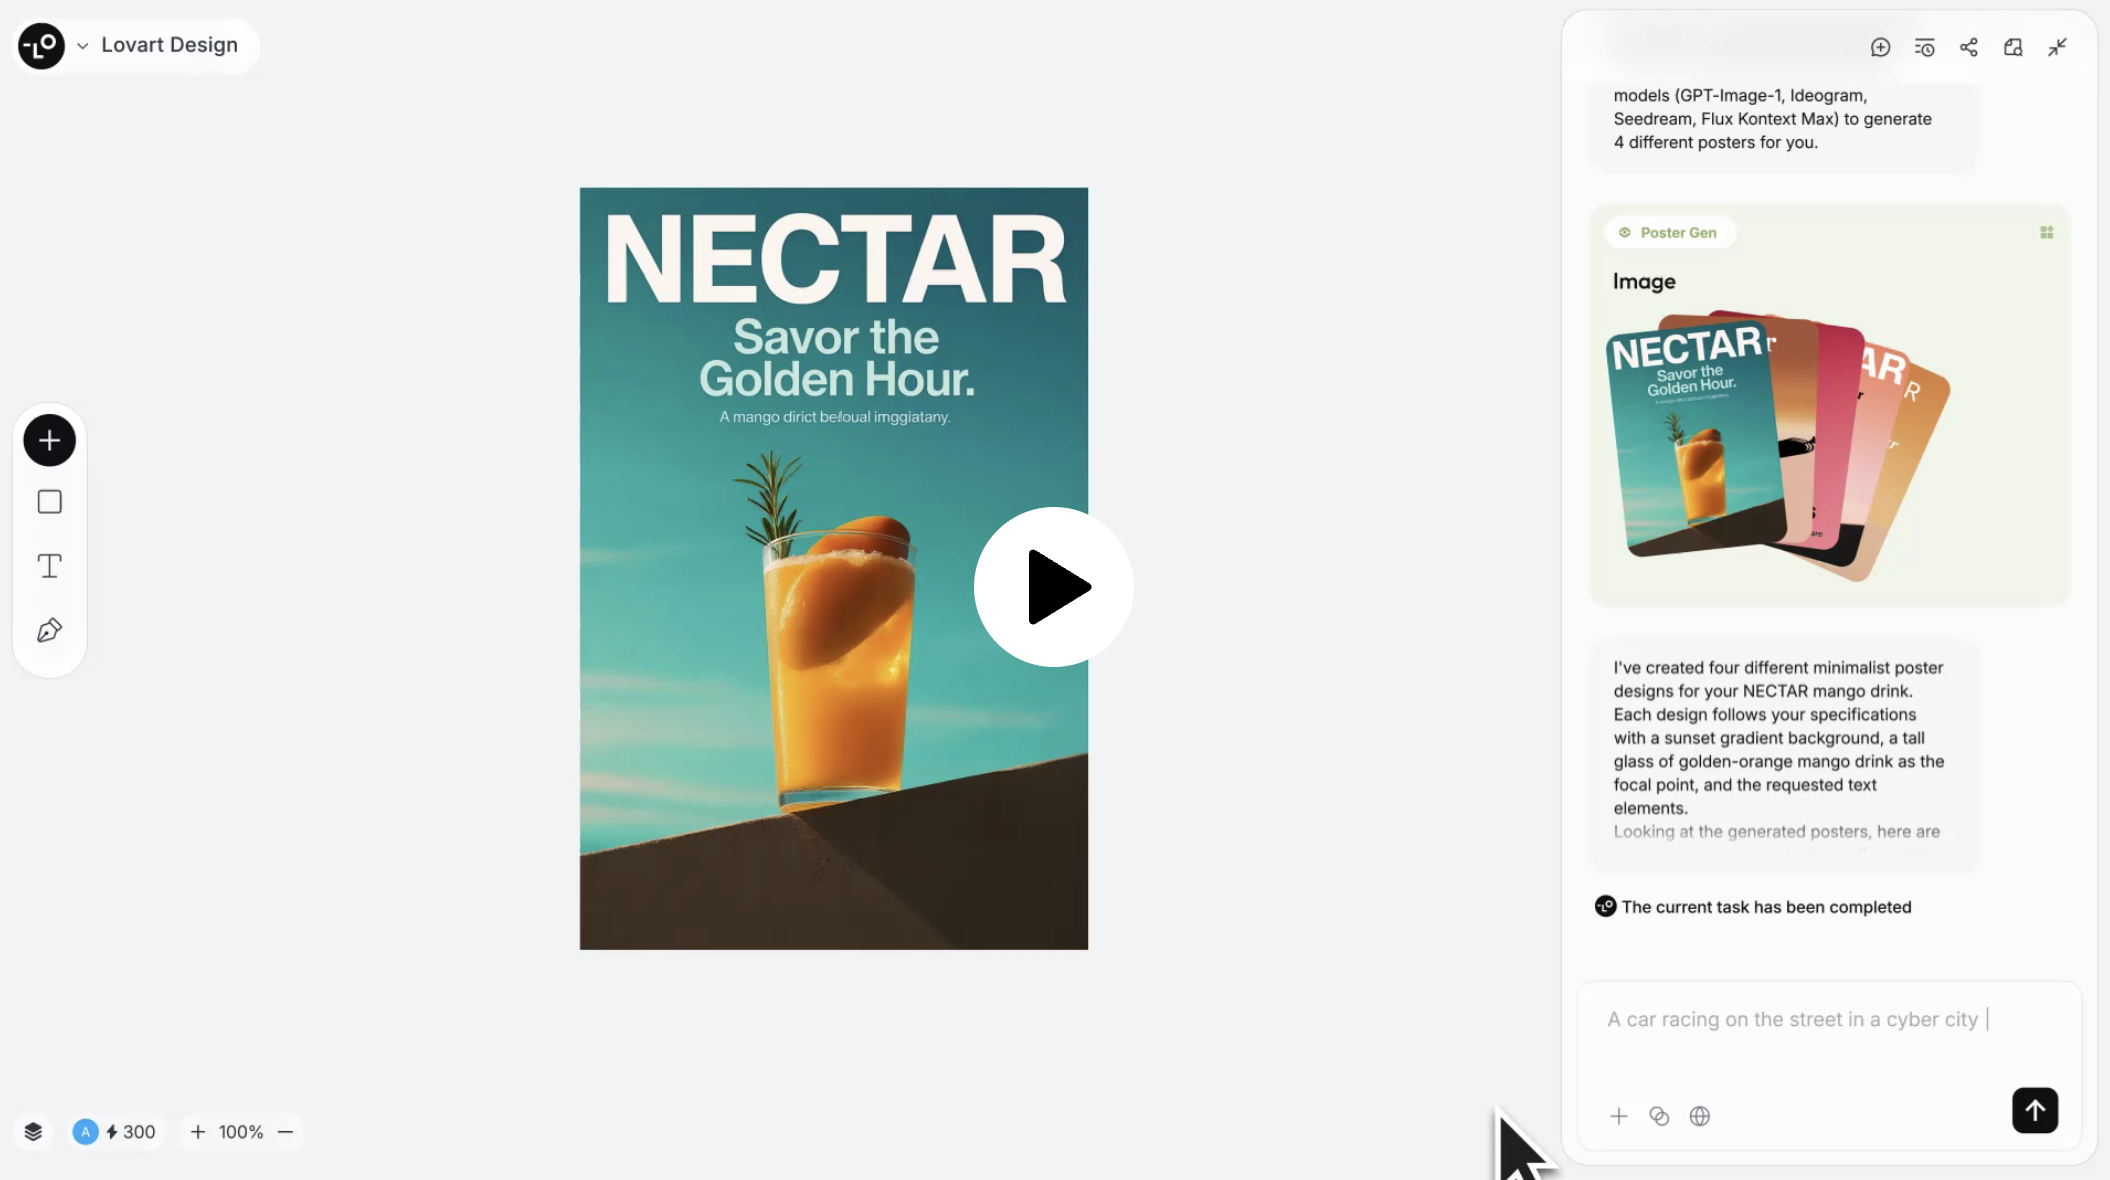
The image below shows Lovart's product interface, which uses Konva.js mentioned in our Lesson 21 - Transformer as the underlying technology. Although primarily focused on image editing, it doesn't abandon common features from graphic editors, such as the layer list hidden by default in the bottom left corner, and the left toolbar can also insert some basic shapes.
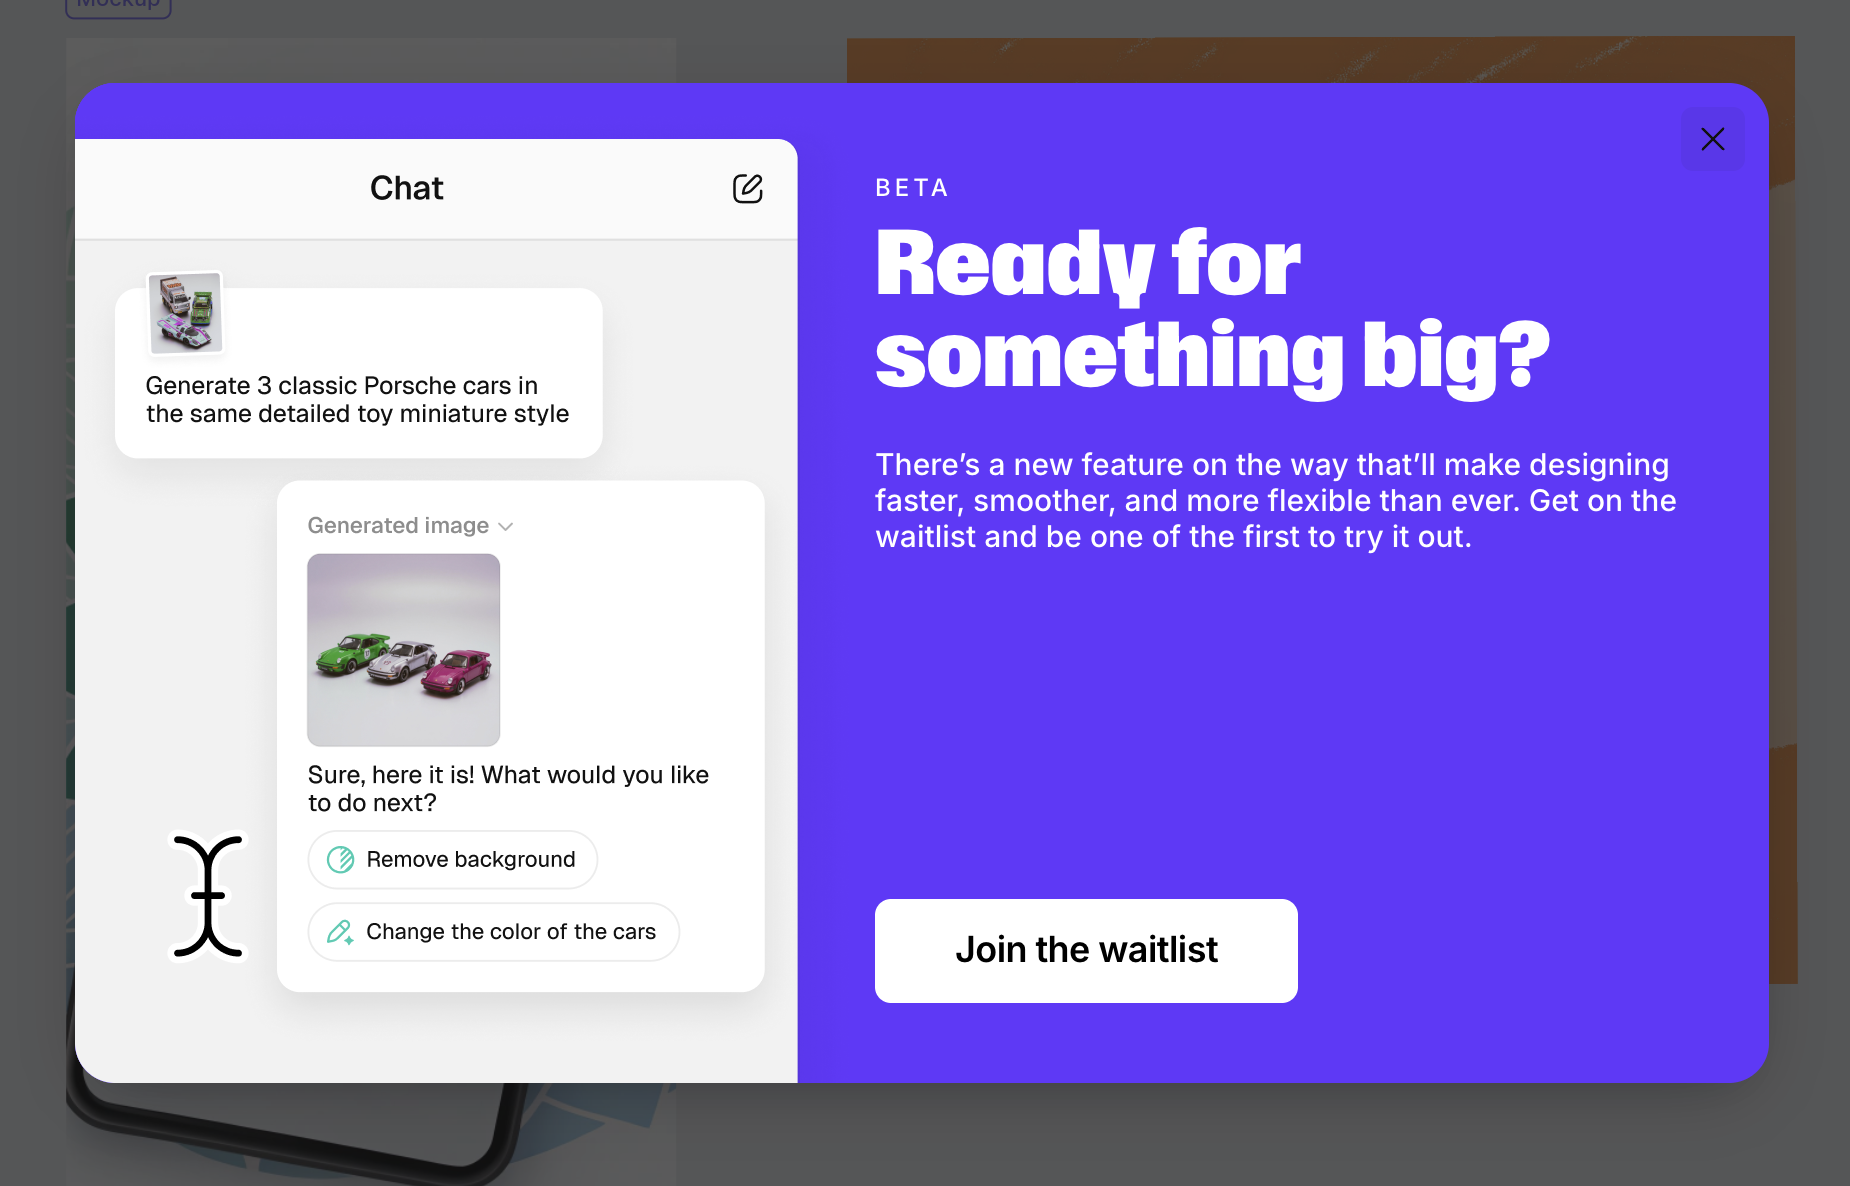
Recraft is also testing chat functionality. In my observation, canvas and chat are becoming the two main entry points for this type of editor:
In this lesson, we'll combine with Nano banana to enrich our image editing functionality.
Integrating Models
To use Nano banana, I chose fal.ai over Google's official generative-ai. The reason is that a unified API makes it easier for me to compare the effects of other image generation models, such as qwen-image-edit or FLUX.1 Kontext.
There are many other aggregated SDKs like OpenRouter. Taking the image generation interface as an example, you only need to pass in a prompt to receive the URL for the generated image and the original model text response:
import { fal } from '@fal-ai/client';

const result = await fal.subscribe('fal-ai/gemini-25-flash-image', {
    input: {
        prompt: '',
    },
});
console.log(result.data); // { image: [{ url: 'https://...' }]; description: 'Sure, this is your image:' }
The image edit API also accepts a set of image URLs as parameters. Even when passing encoded DataURLs, warnings like “Unable to read image information” may still appear. Therefore, fal.ai provides a file upload interface, allowing us to enable uploads when local images are added to the canvas.
API Design
We require an API responsible for generating and modifying images. In both scenarios, the parameters should be identical: a prompt and a list of reference images.
import { fal } from '@fal-ai/client';

api.createOrEditImage = async (
    isEdit: boolean,
    prompt: string,
    image_urls: string[],
): Promise<{ images: { url: string }[]; description: string }> => {
    const result = await fal.subscribe(
        isEdit
            ? 'fal-ai/gemini-25-flash-image/edit'
            : 'fal-ai/gemini-25-flash-image',
        {
            input: {
                prompt,
                image_urls,
            },
        },
    );
    return result.data;
};
Chatbox
The chat box provides another starting point beyond the canvas.
Remove background
Double click image to enter edit mode:
private async removeBackground() {
    this.removingBackground = true;
    const { images } = await createOrEditImage(
        true,
        'Remove background from the image',
        [this.node.fill],
    );
    if (images.length > 0) {
        this.api.runAtNextTick(() => {
        this.api.updateNode(newImage, { fill: images[0].url });

        this.api.record();
        this.removingBackground = false;
        });
    }
}
Inpainting
Suitable for erasing or modifying selected existing objects in an image while ensuring other parts remain unchanged.
https://www.recraft.ai/docs#inpaint-image
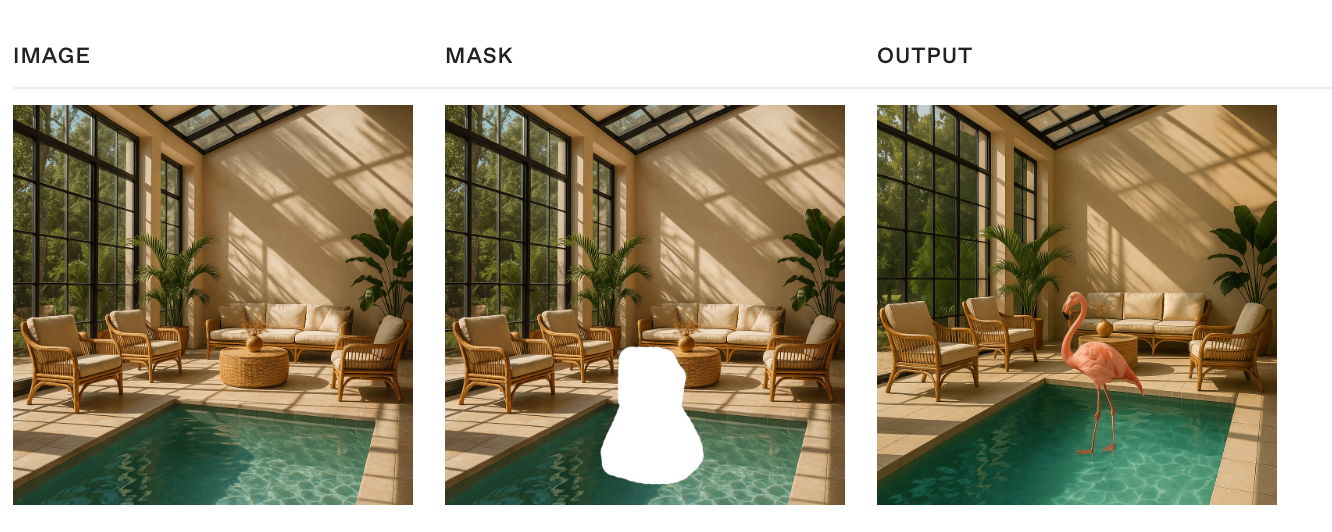
Inpainting replaces or modifies specific parts of an image. It uses a mask to identify the areas to be filled in, where white pixels represent the regions to inpaint, and black pixels indicate the areas to keep intact, i.e. the white pixels are filled based on the input provided in the prompt.
When users draw a closed area using a simple editor, it needs to be converted into a mask parameter to pass to the API. This mask is essentially a grayscale image:
This is where the importance of editors becomes apparent. Even simple editing features have value. Recraft mentions three points: https://www.recraft.ai/blog/inpainting-with-ai-how-to-edit-images-with-precision-using-recraft
- Ease of zooming in and out - After all, it's a precision operation, so canvas zooming is crucial.
- AI inpainting using segmentation models like SAM automatically
- Creative flexibility
Create mask
We offer multiple interactive methods for users to generate masks:
Using SAM via WebGPU
In addition to allowing users to define the modification area as precisely as possible, it would be even better if area selection could be accomplished through simpler methods, such as clicking to select.

In Lesson 1 - Hardware abstraction layers, we introduced the advantages of WebGPU (Figma also recently upgraded its rendering engine). Beyond rendering, it makes browser-side GPGPU possible with Compute Shader support. ONNX provides a web-based runtime, enabling real-time inference directly in the browser without consuming any tokens. For details, see: How to add machine learning to your web application with ONNX Runtime.
We refer to this article: Image Segmentation in the Browser with Segment Anything Model 2 and implemented the following optimizations:
- Utilized the ORT model format to reduce the size of downloaded models during runtime
- Employed WebGPU for faster inference speeds. For details, see: Using the WebGPU Execution Provider
- Executed within WebWorkers to avoid blocking the main thread
We wrap them up in SAM plugin. Here's our example: Use SAM in WebWorker.
For other practices and SAM3-related materials, please refer to:
- Segment Anything 2, in WebGPU
- Request for Official ONNX Export + TensorRT Conversion Scripts for SAM3
The mask obtained through SAM can be used as a reference image to feed into the raw image model.
Using LaMa
Client-Side Image Inpainting with ONNX and Next.js explains how to use the LaMa model on the client side.
Combining Multiple Images
Using canvas allows us to obtain additional positional information about images, which is often difficult to describe with language. For example, we can drag a teacup to any position on a desktop and composite an image.
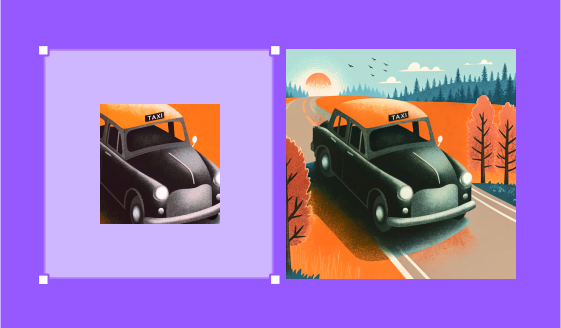
Outpainting
This feature doesn't have a corresponding API implementation from OpenAI yet. Let's first see how Recraft does it. https://www.recraft.ai/blog/ai-outpainting-how-to-expand-images
Outpainting allows users to expand an image beyond its original frame — especially useful for completing cropped images or adding more background scenery.
Suitable for keeping selected objects in the image unchanged, such as changing the background:
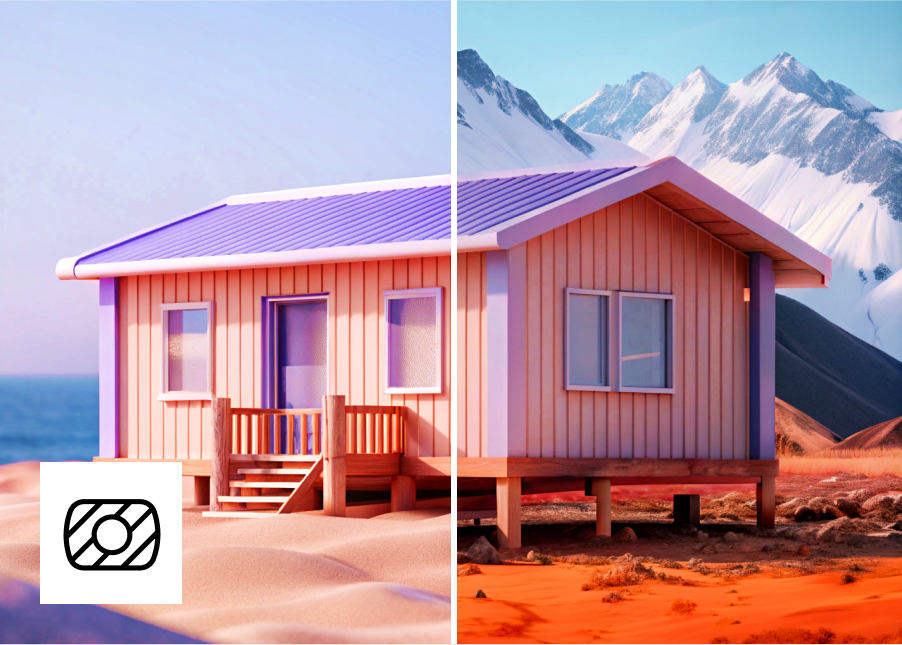
Or expanding outward:
Currently, GPT 4o only supports three fixed sizes, while Nano banana needs some hack methods to achieve arbitrary image size output, such as passing in a blank image of a specified size as a reference and emphasizing it in the prompt. We can make this very natural through canvas operations: users only need to drag to the appropriate size, and the application automatically generates this blank reference image through the Canvas API.
Layer separation
Raster to vector
Many online and open-source tools offer solutions based on traditional image processing:
- Recraft AI image vectorizer
- Lottiefiles Raster to Vector converter
- vtracer
However, this approach does not yield satisfactory results for text processing:
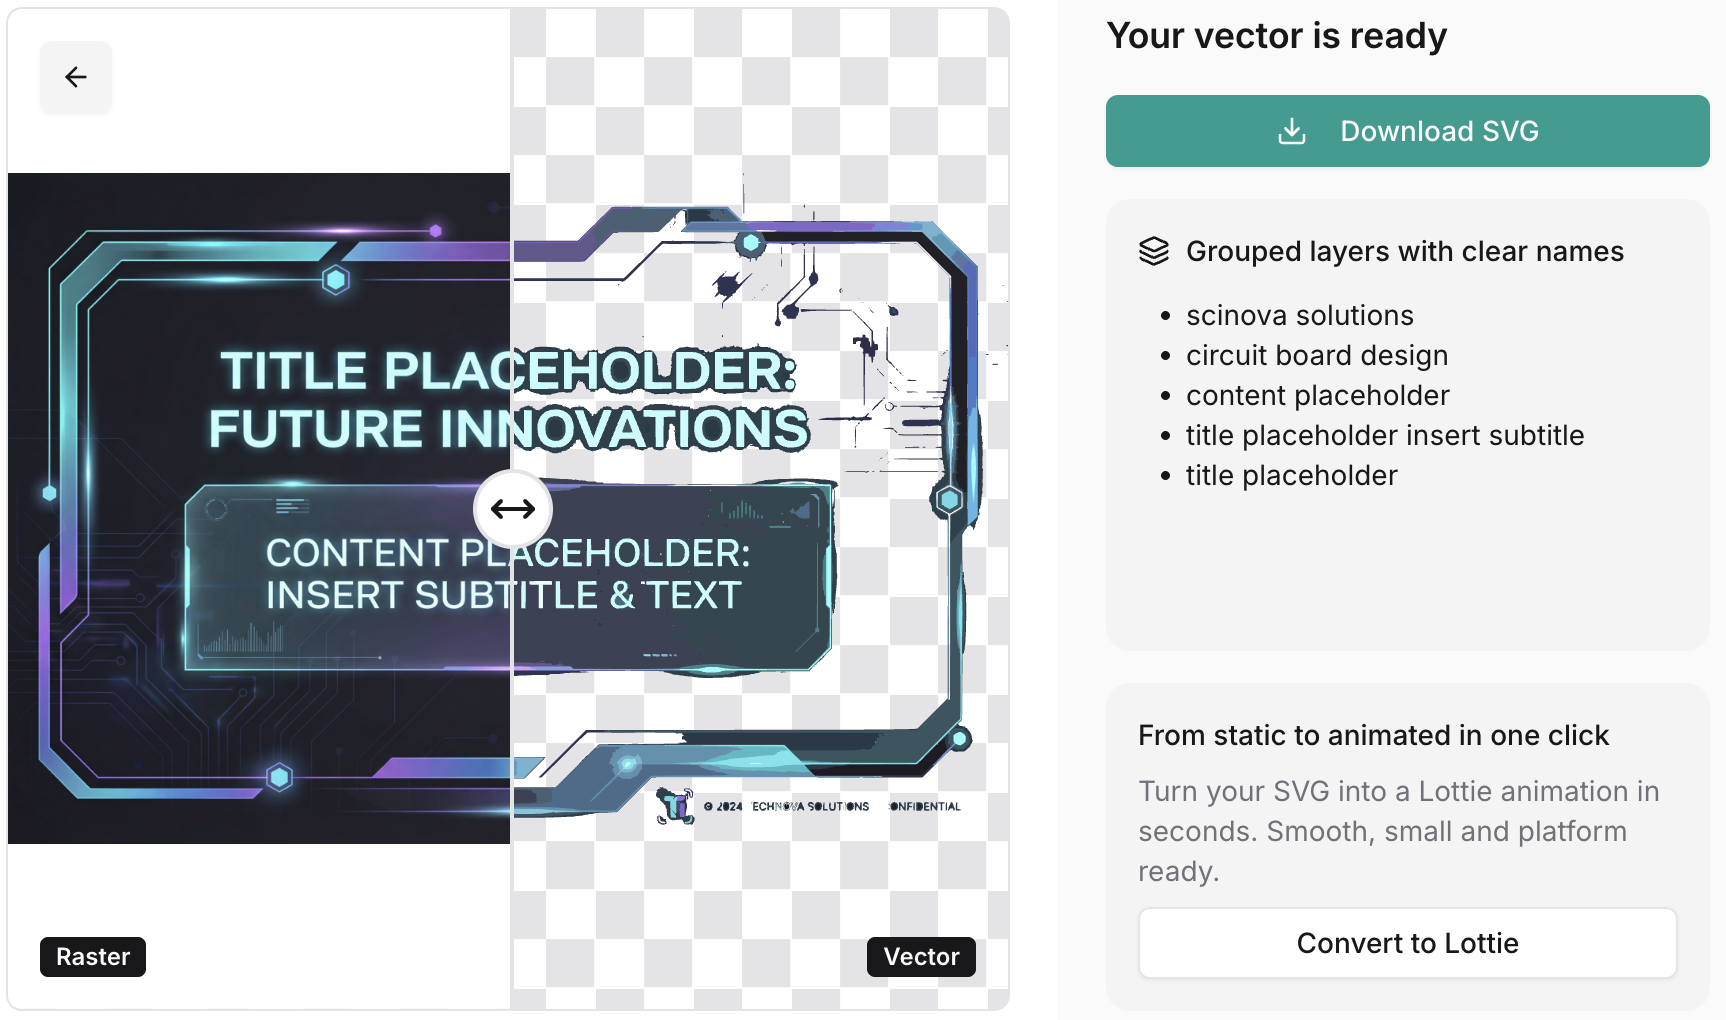
The reason is that this algorithm is typically divided into the following stages, with the first stage not distinguishing between text and graphics suitable for vectorization:
- “Path walking” converts pixels into paths
- Paths are simplified into polygons
- Attempts are made to smooth the polygons

Split background and text
First, use an OCR-like tool to identify text regions and generate a mask. Then, remove the mask and have the model regenerate the image through a standard inpainting process to obtain a background image without text.
FLUX-Text: A Simple and Advanced Diffusion Transformer Baseline for Scene Text Editing
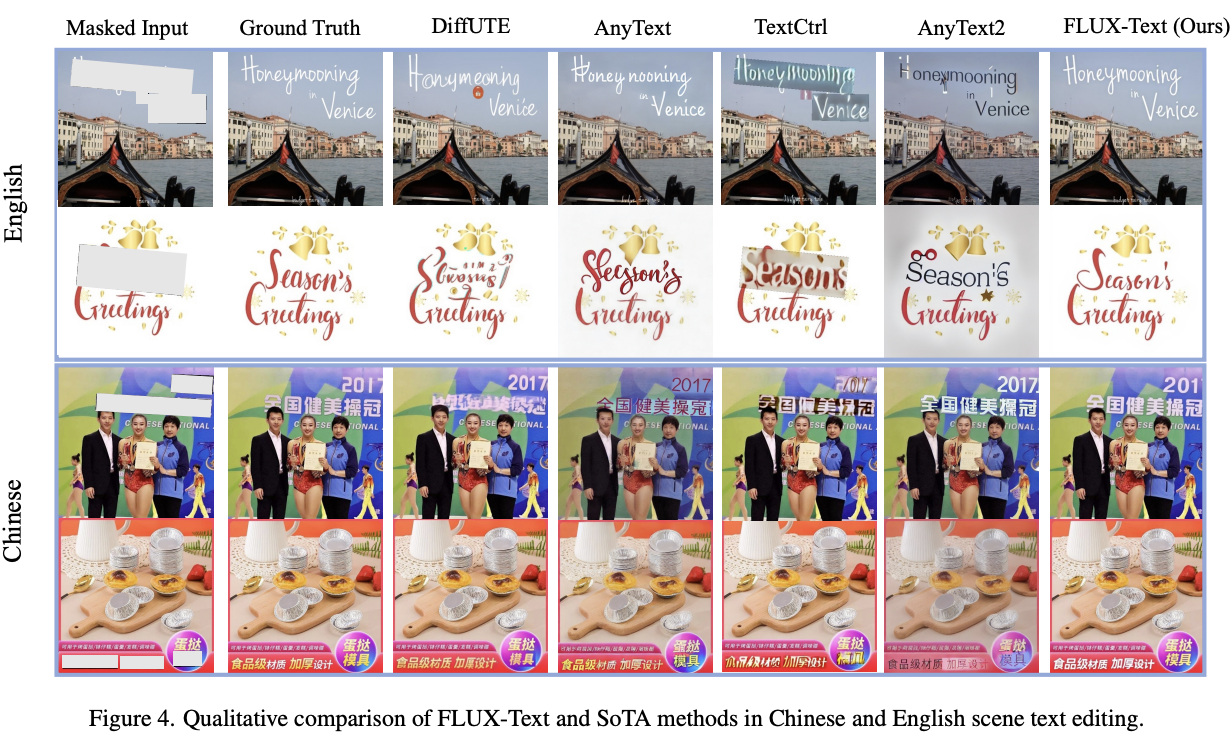
Using the open-source Qwen-Image-Layered enables layer decomposition. In the fal.ai plugin, we achieved the following effect:

Font recognition
Next, we need to identify the style attributes such as font and font size within the text area.
TextStyleBrush: Transfer of Text Aesthetics from a Single Example
Adobe Photoshop provides Match fonts:

whatfontis provides a public API that matches the closest font in its font library to a specified area within an image.
[
    {
        "title": "Abril Fatface",
        "url": "https://www.whatfontis.com/FF_Abril-Fatface.font",
        "image": "https://www.whatfontis.com/img16/A/B/FF_Abril-FatfaceA.png"
    }
]
Finally, overlay all the layers.
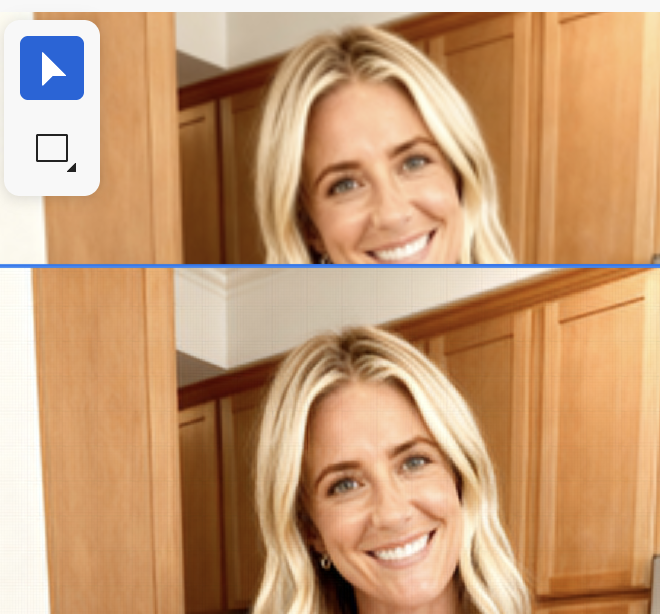
Upscale image
We can upscale image with model, the following diff picture comes from Topaz Gigapixel:

We can use fal-ai/topaz/upscale/image or SeedVR2 in fal.ai. In browser side, we can use UpscalerJS in webworker, see our upscaler plugin, which uses @upscalerjs/esrgan-medium 4x model by default.
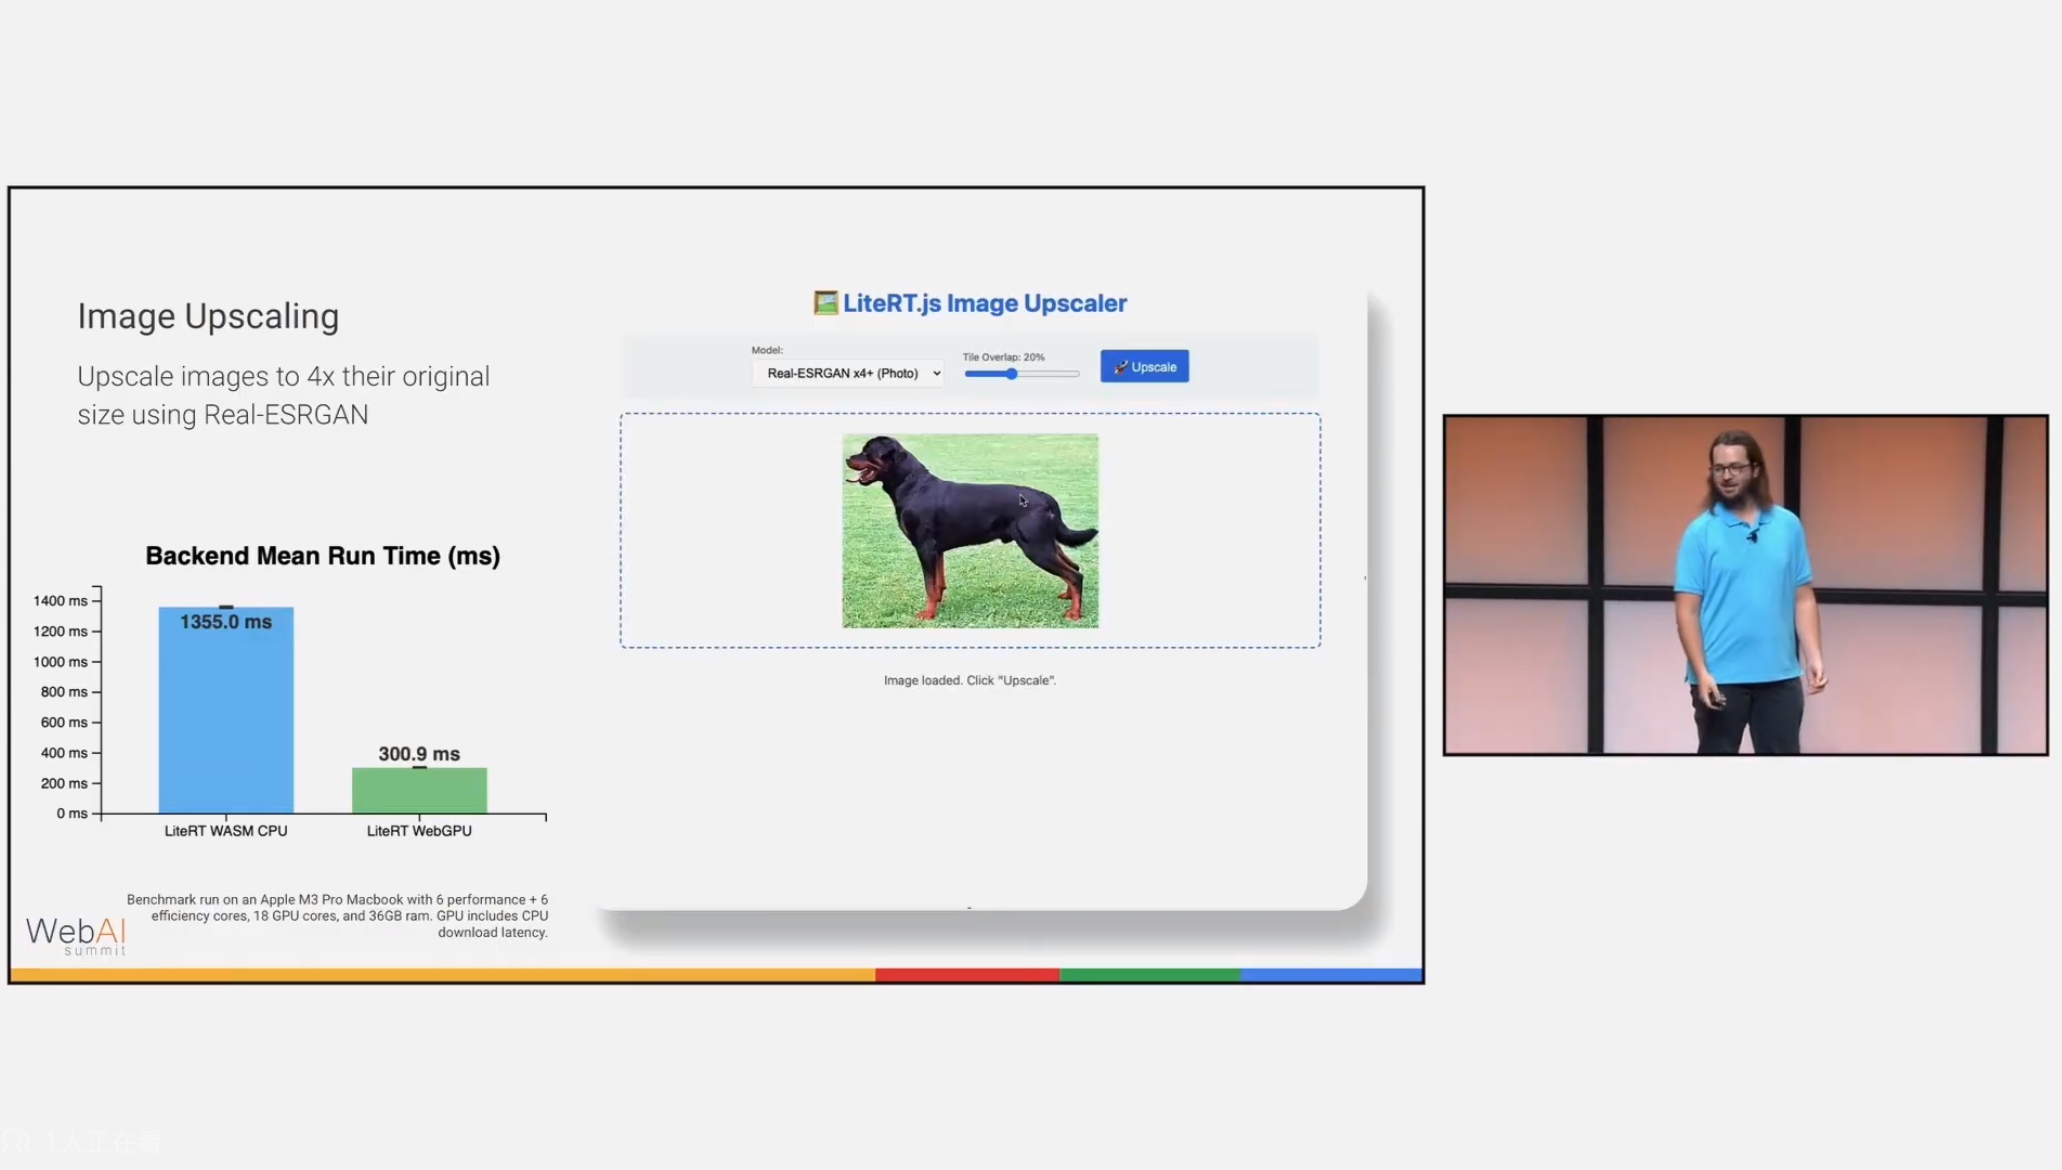
Other browser runtime
UpscalerJS uses tensorflow.js, you can choose super-resolution-js with ONNX runtime, or a new runtime called LiteRT:
[WIP] MCP
MCP: What It Is and Why It Matters:
Instead of only having a GUI or API that humans use, you get an AI interface “for free.” This idea has led to the concept of “MCP-first development”, where you build the MCP server for your app before or alongside the GUI.
pencil.dev
The bi-directional MCP vector canvas you’ve been dreaming about. see pencil.dev
Pencil doesn’t provide just MCP reading tools, but also full write access + many other handy tools to fully operate the canvas. This is the real magic. You can plug-in the whole world of MCPs, bring in data from other sources like databases, APIs, chart data, Playwright/Puppeteer or plugin other agents easily. You are in charge!
Figma MCP Server can manipulate Figma API.